As more people shoot videos with their smartphones, “image stabilization” has become a crucial factor determining the quality of the final production. Especially in walking videos, travel vlogs, and product reviews, even slight shakes can break a viewer’s concentration and lead to disengagement. This is why many users are turning to a smartphone gimbal.
A smartphone gimbal significantly enhances overall image stability by suppressing physical shake while allowing smooth pan, tilt, and roll movements. However, simply using a gimbal doesn’t automatically guarantee perfect footage. True professional-quality, stable video is achieved only by correctly understanding its functions and mastering basic operation.
If you want to master your smartphone gimbal, please continue reading. We will provide a clear, practical, and professional perspective on key points for shooting stable videos.
Correctly Balance Your Smartphone
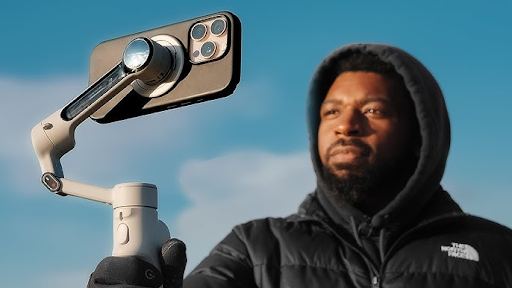
The first stumbling block when using a スマホジンバル is balancing. While the gimbal uses motors for correction, if the smartphone is constantly leaning to one side, motor load increases, correction power decreases, and resulting shake becomes more noticeable. In fact, official data from companies like DJI and Insta360 show that poor balance shortens motor life and compromises stability by about 40%. The adjustment takes only a few seconds but is a vital step that determines shot quality. Micro-adjust the slider position on the gimbal so that the phone is level the moment you mount it. If your phone case is heavy, remove it or switch to a lightweight case to further improve stability.
Change Your Walk to Reduce Vertical Shake
When walking while holding the gimbal, a normal stride often generates vertical shake. This is caused by “heel strike,” where the body’s up-and-down movement is translated directly into the footage. The “Ninja Walk” is effective for stability: slightly bending the knees and landing with the whole foot absorbs impact. Professional users of Insta360 and Zhiyun recommend this walking style. Furthermore, numerous reviews confirm that simply supporting the gimbal with two hands instead of one can reduce shake by about 30%. By optimizing the shooter’s body movement rather than relying entirely on the gimbal’s correction power, you achieve smoother footage.
Use Shooting Modes Appropriate for the Scene
Most smartphone gimbals come with multiple modes, such as PF (Pan Follow), PTF (Pan & Tilt Follow), and L (Lock). Each excels in different scenarios. For example, PF creates natural and stable movement for street walking or following a person. Conversely, the L (Lock) mode is better for maintaining a consistent horizontal line when shooting buildings or stationary objects. Advanced models like the Insta360 Flow, with high AI tracking performance, can accurately track a subject’s movement when combined with mode switching. Be careful: choosing a mode that doesn’t fit your shooting goal can cause the gimbal’s correction and your movement to interfere, resulting in unstable video.
Consciously Use Slow Gimbal Movements
The speed of movement is extremely critical for stabilizing video. If you execute pan or tilt operations too quickly, the gimbal’s correction may not keep up, leading to sudden jitters. Even in professional settings, the basic rule is to move “twice as slowly” as you think you should. For instance, when tracking a subject, increase smoothness by rotating your whole body slowly instead of relying on large arm movements. Also, excessive use of the roll axis often leads to horizontal skewing, so minimizing roll operation is best. Since simply moving slowly dramatically improves stability, this is a point beginners should practice consciously.
Minimize Shake by Understanding Framing and Lens Characteristics
The wide-angle lens on a smartphone is inherently more resistant to shake, but the telephoto end is susceptible to even small movements. This is due to the “amplification of shake” caused by focal length. If you frequently use telephoto in travel videos, you may notice shake even with a gimbal. Therefore, the basic practice for prioritizing stable footage is to shoot primarily within the wide to standard focal range. Additionally, since many smartphones show strong distortion when subjects are near the edge of the frame, positioning the subject closer to the center of the frame maintains a natural look. Adjusting the framing is a highly effective, advanced technique for improving stability.
Understand and Counter Environmental Effects
In outdoor shooting, wind, vibration, and uneven pavement can cause shake. Especially in high winds, the gimbal motors work harder against wind pressure, leading to instability. While heavier gimbals are generally more stable, if you have a lightweight model, hold it close to your body to minimize wind exposure. Furthermore, when shooting from a bicycle or other vehicle, vibrations from the handlebar often transmit to the phone. Using a vibration-dampening pad with the mount can be effective. By understanding and responding to environmental factors, you can maximize the stability of your smartphone gimbal.
Summary for Stabilizing Video with a Smartphone Gimbal
A smartphone gimbal is a powerful tool that can dramatically improve the quality of your mobile videos when handled correctly. However, the final stability depends not only on the device but also significantly on the user’s operation, walking style, mode selection, and environmental adaptation. By being mindful of the points introduced in this article, anyone can achieve smooth, professional-looking footage.
Specifically, balancing the phone, moving slowly, and utilizing the wide-angle over the telephoto lens are highly effective techniques that beginners can immediately implement. We encourage you to utilize your smartphone gimbal to expand your shooting possibilities further.